This year in BlackHat London 2019, I presented my tool Octopus in BlackHat Arsenal, and it was really fun to present the tool in front of some talented hackers and hear a feedback about the tool from them.
So I just wanted to share a complete guide on how you can use Octopus the Pre-Operation C2 before you start your real operation, and I will mention why you have to use Octopus before your real operation.
What is Octopus ?
Octopus is an open source, pre-operation C2 server based on python3 which can control an Octopus powershell agent through HTTP/S.
Why to use Octopus ?
The main purpose of creating Octopus is for use before any red team operation, where rather than starting the engagement with your full operational arsenal and infrastructure, you can use Octopus first to attack the target and gather information before you start your actual red team operation without put your real infrastructure in risk!
Octopus is designed to be stealthy and covert while communicating with the C2, as it uses AES-256 by default for its encrypted channel between the powershell agent and the C2 server. You can also opt for using SSL/TLS by providing a valid certficate for your domain and configuring the Octopus C2 server to use it.
One cool feature in Octopus is called ESA, which stands for “Endpoint Situational Awareness”, which will gather some important information about the target that will help you to gain better understanding of the target network endpoints that you will face during your operation, thus giving you a shot to customize your real operation based on this information.
Octopus Features ?
- Control agents through HTTP/S.
- Execute system commands.
- Download files.
- Load external Powershell modules.
- Use encrypted channels (AES-256) between C2 and agents.
- Use inconspicuous techniques to execute commands and transfer results.
- Create custom and multiple listeners for each target.
- Generate different types of payloads.
- Support all windows versions with powershell 2.0 and higher.
- Run Octopus windows executable agent without touching powershell.exe process.
- Create Custom profiles.
- Gather information automatically from the endpoint (endpoint situational awareness) feature.
Octopus Installation
To install Octopus you just have to clone the latest version from the following URL:
https://github.com/mhaskar/Octopus
And execute the following to install all the python requirements:
sudo pip3 install -r requirement.txt
You can also install `mono-devel` to use the C# compilation feature inside Octopus from the following command:
apt install mono-devel
After that we are totally ready to use Octopus!
Octopus Profiles
Octopus Profiles will let you control the URL structure for your C2, and you can customize it based on the scenarios you want to put your C2 on.
That will help avoiding any static IoCs or signature related to Octopus while using it on the wild.
You can edit the file profile.py to start building your own profile which contains the following main URLs:
- file_receiver_url : handles file downloading.
- report_url : handle ESA reports.
- command_send_url : handles the commands that will be sent to the target.
- command_receiver_url : handles commands will be executed on the target.
- first_ping_url : handles the first connection from the target.
- server_response_header : this header will show in every response.
Listeners
Once you customized a profile, you are now ready to create a listener for your operation, Octopus depends on HTTP/S to communicate with the agents in an asynchronous way.
The agent will try to communicate with the listener based on the interval time you set while you creating the listener, so if you created a listener and set the interval to 5 seconds for example, the agent will try to connect each 5 seconds and check if there is a command to execute or not.
Octopus will encrypt the data between the agent and the server by default using (AES-256 encryption) with a pre-generated hard-coded key in the agent.
The next version of Octopus will has a key exchange algorithm that transfer the encryption key securely.
Octopus transfer the data in a legitimate way to mimic a normal user by sending and receiving a legitimate HTTP requests/response and embed the data in well known and used headers.
HTTP Listener
You can create a HTTP Listener in octopus using the command “listen_http” like the following:
listen_http listen_ip port hostname interval page listener_nameOf course you need to pass some options which are:
- BindIP: the IP address that will be used by the listener.
- BindPort: the port you want to listen on.
- Hostname: the hostname you will use to communicate with.
- Interval: How number of seconds the agent will wait before checking for commands.
- URL: The name of the page hosting the payload (ex: index.php).
- Listener_name: Listener name to use.
Please make sure to enter the options in the correct order
HTTPS Listener
Using the HTTPS Listener you can communicate with your agents via SSL/TLS encrypted channel which will give you more power while communicating with the agents.
Of course you will need a domain name and a valid SSL certificates for that domain, so I suggest to read this article to know how you can generate and use letsencrypt certificates.
We can create a HTTPS listener using the command “listen_https” like the following:
listen_https listen_ip port hostname interval page listener_name certficate_path key_pathYou need to pass some options which are:
- BindIP: the IP address that will be used by the listener.
- BindPort: the port you want to listen on.
- Hostname: the hostname you will use to communicate with.
- Interval: How number of seconds the agent will wait before checking for commands.
- URL: The name of the page hosting the payload (ex: index.php).
- Listener_name: Listener name to use.
- certficate_path : path for valid ssl certficate (called fullchain.pem for letsencrypt certficates)
- key_path : path for valid key for the ssl cerficate (called key.pem for letsencrypt certficates)
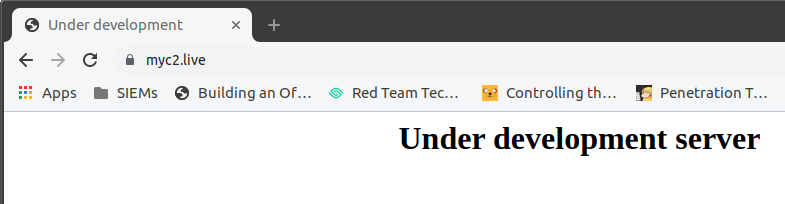
After creating the listener on our domain “myc2.live”, we should see the following:
Generating agents
You can generate agents to communicate with your C2 via a specific listener you choose, the agents can do multiple tasks for you such as:
- Execute system commands.
- Load external powershell modules.
- Download files from the target machine.
- Run ESA module to gather some very useful information about the target
We can generate and deliver our agent using the following methods:
- Powershell one-liner
- HTA one-liner (reused from APT34)
- Windows executable (exe file)
Generate Powershell one-liner
The powershell one-liner will give you the ability to generate a powershell command that download and execute your payload directly from your C2.
You can generate the powershell one-liner using the command “generate_powershell” as the following:
generate_powershell listener_nameGenerate HTA one-liner
The HTA on-liner is reused from APT34, thanks to @ahmedkhlief he was able to reuse the code from APT34 threat group, which download the HTA file content from the C2 and run it using mshta.exe trusted windows binary to get the final powershell agent executed.
You can generate the HTA one-liner using the command “generate_hta” as the following:
generate_hta listener_nameGenerate Windows executable (exe file)
Octopus can build a ready to use windows executable (exe file) for you using mono-project to compile the C# agent to an executable.
Octopus use a technique called “unmanaged powershell” to execute the powershell script without touching the powershell.exe binary, which can help you to avoid any restrictions on powershell.exe.
Octopus will use “System.Management.Automation.dll” file to compile the C# code and then use the “PowerShell” object to start the powershell code execution.
The binary itself is very clean and undetected, and of course it still under development, So just wait for more updates on this feature before consider using it on the wild!
You can generate the exe file using the command “generate_exe” as the following:
generate_exe listener_name output_pathInteracting with agents
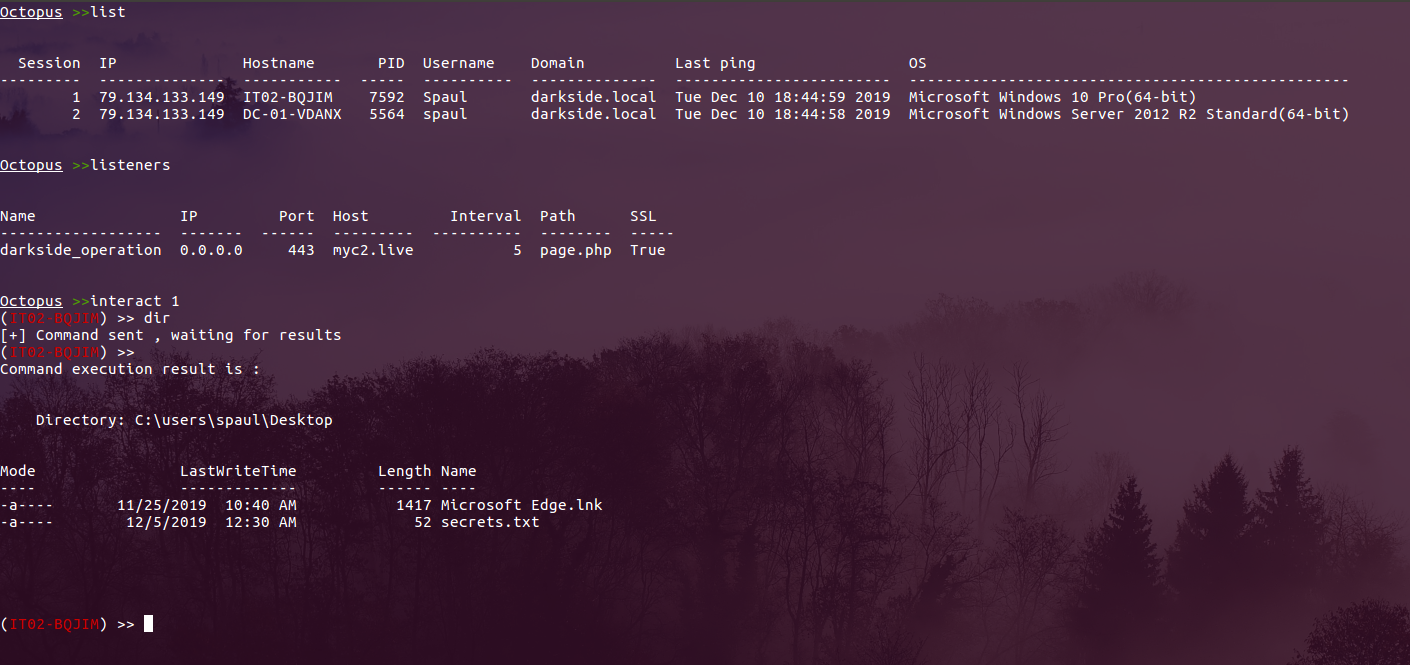
After getting a connection from any of your agents, you can list all the agents using the command “list” and to interact with a client, you can use the command “interact session” like the following:
Execute system commands
After interacting with an agent, all you need to execute system command is just to type the command and wait for the results!
The command execution process is interactive, which means that anything you execute will remain in the same process context, such as changing directory, load modules for future usage and so on.
If there is any problem occurred during the command execution, the agent will return back the error as it is from powershell which can help you to define problems while executing your commands.
And here is an example of executing the command “ipconfig” for example on one of the agents:
Load external powershell modules
You can also load powershell modules to Octopus to help you during your attack, you just have to copy the modules you want to use to “modules” directory then while interacting with the agent execute “load module_name” to load the module directly and also you can use “modules” command to show all available modules.
In this example I will show you how we can load powerview.ps1 and then execute Get-NetComputer
Run ESA module to gather some very useful information about the target
The ESA module stands for “Endpoint Situational Awareness” which helps the attacker to get some extra information about the endpoint and the infrastructure such as:
- What is the build of the OS ?
- Which AV/EDR they are using ?
- Is they have Sysmon enabled ?
- Which SIEM collector they are using ?
- And among of some other information
You can use the ESA module after interacting with the agent using “report” command like the following:
Download files from the target machine
You can use Octopus to download files from the targets machines, you just need to execute “download file_path” to get the file downloaded.

Full Demo!
Upcoming features
Well, there is A LOT of cool features coming to Octopus soon and some of them are in testing already, but first I need to release the stable version and make sure that there is no any problems with the code base.
Here are some of the coming features to Octopus:
- Implementing asymmetric encryption by default to exchange the encryption key
- Full front-end design customization via profile
- Enhancements on ESA module
- Add persistence modules
- Ability to take screenshots
- Generate agents with random strings
And you can suggest a feature or report an issue via the project Github main repository.
You are great man
Fantastic,Great efforts man
typo: pip3 install -r requirements.txt
Thank you for the sahre.
If i try to download a slightly bigger file the client freezes. Any suggestions on how to transfer large files from client?
How can we get the web based c2domain